This example demonstrates creating a T-shaped geometry using boolean operations.
T-shape geometry
Setup
mkdir -p TRUST_TUTORIALS/salome/exo3
cd TRUST_TUTORIALS/salome/exo3
$PathToSALOME/salome &
- Create a new study: File → New
- Select the Geometry module
- Save frequently in HDF format
Creating the Base Cylinders
- Create two cylinders: New Entity → Primitives → Cylinder
- Cylinder_1: Radius 0.5, Height 5 → "Apply"
- Cylinder_2: Radius 0.3, Height 3 → "Apply and Close"
Positioning the Second Cylinder
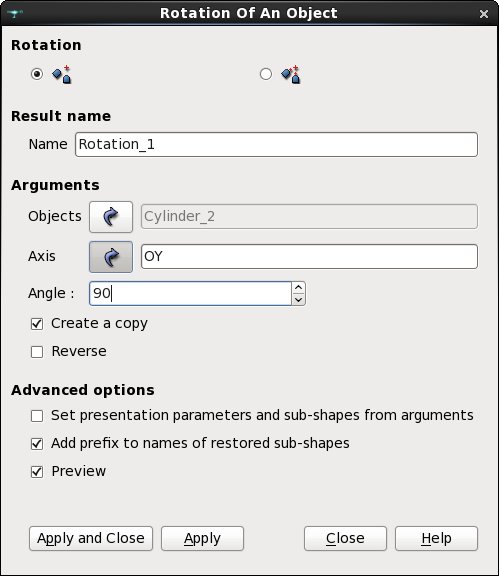
- Rotate Cylinder_2: Operations → Transformation → Rotation
- Name: Rotation_1
- Object: Cylinder_2
- Axis: OY
- Angle: 90°
- Click "Apply and Close"
Rotation step
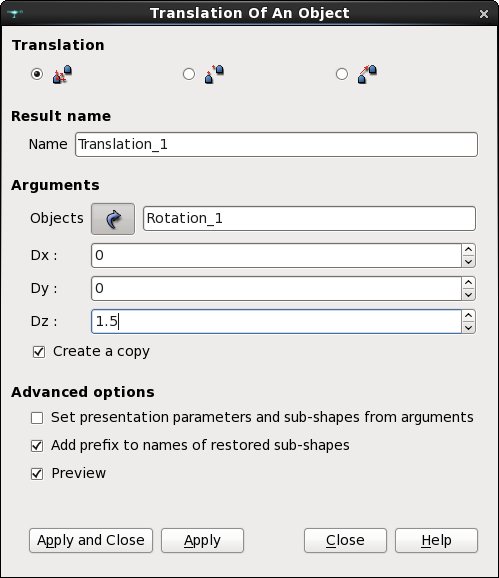
- Translate the rotated cylinder: Operations → Transformation → Translation
- Name: Translation_1
- Object: Rotation_1
- Dx = 0, Dy = 0, Dz = 1.5
- Click "Apply and Close"
Translation step
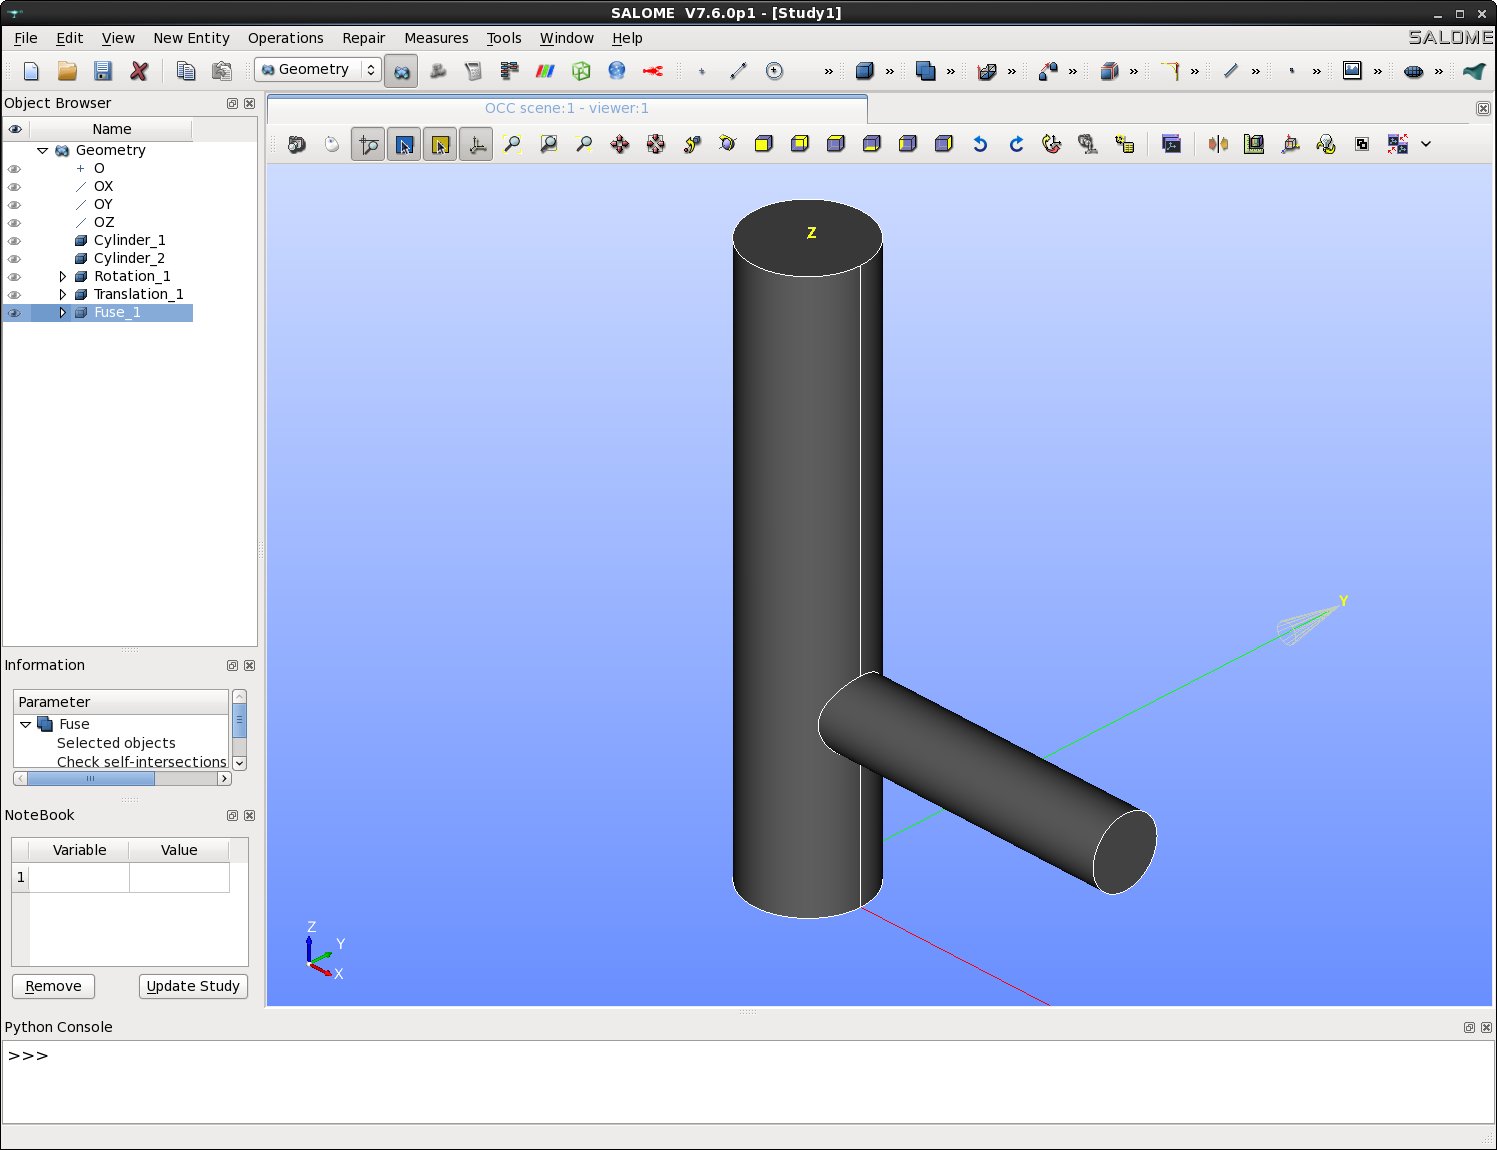
Fusing the Cylinders
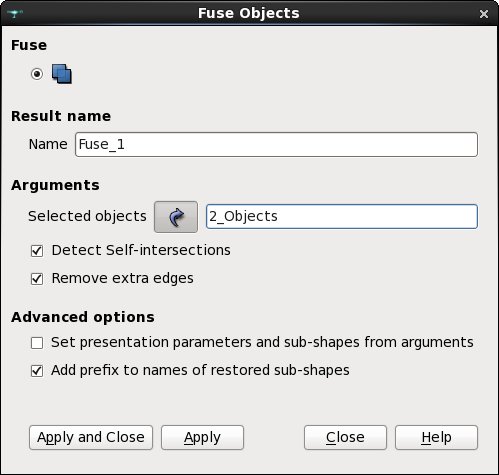
Combine the cylinders: Operations → Boolean → Fuse
- Name: Fuse_1
- Selected Objects: 2 objects (use "Ctrl" to select both Cylinder_1 and Translation_1)
- Click "Apply and Close"
Fuse result
Fuse dialog
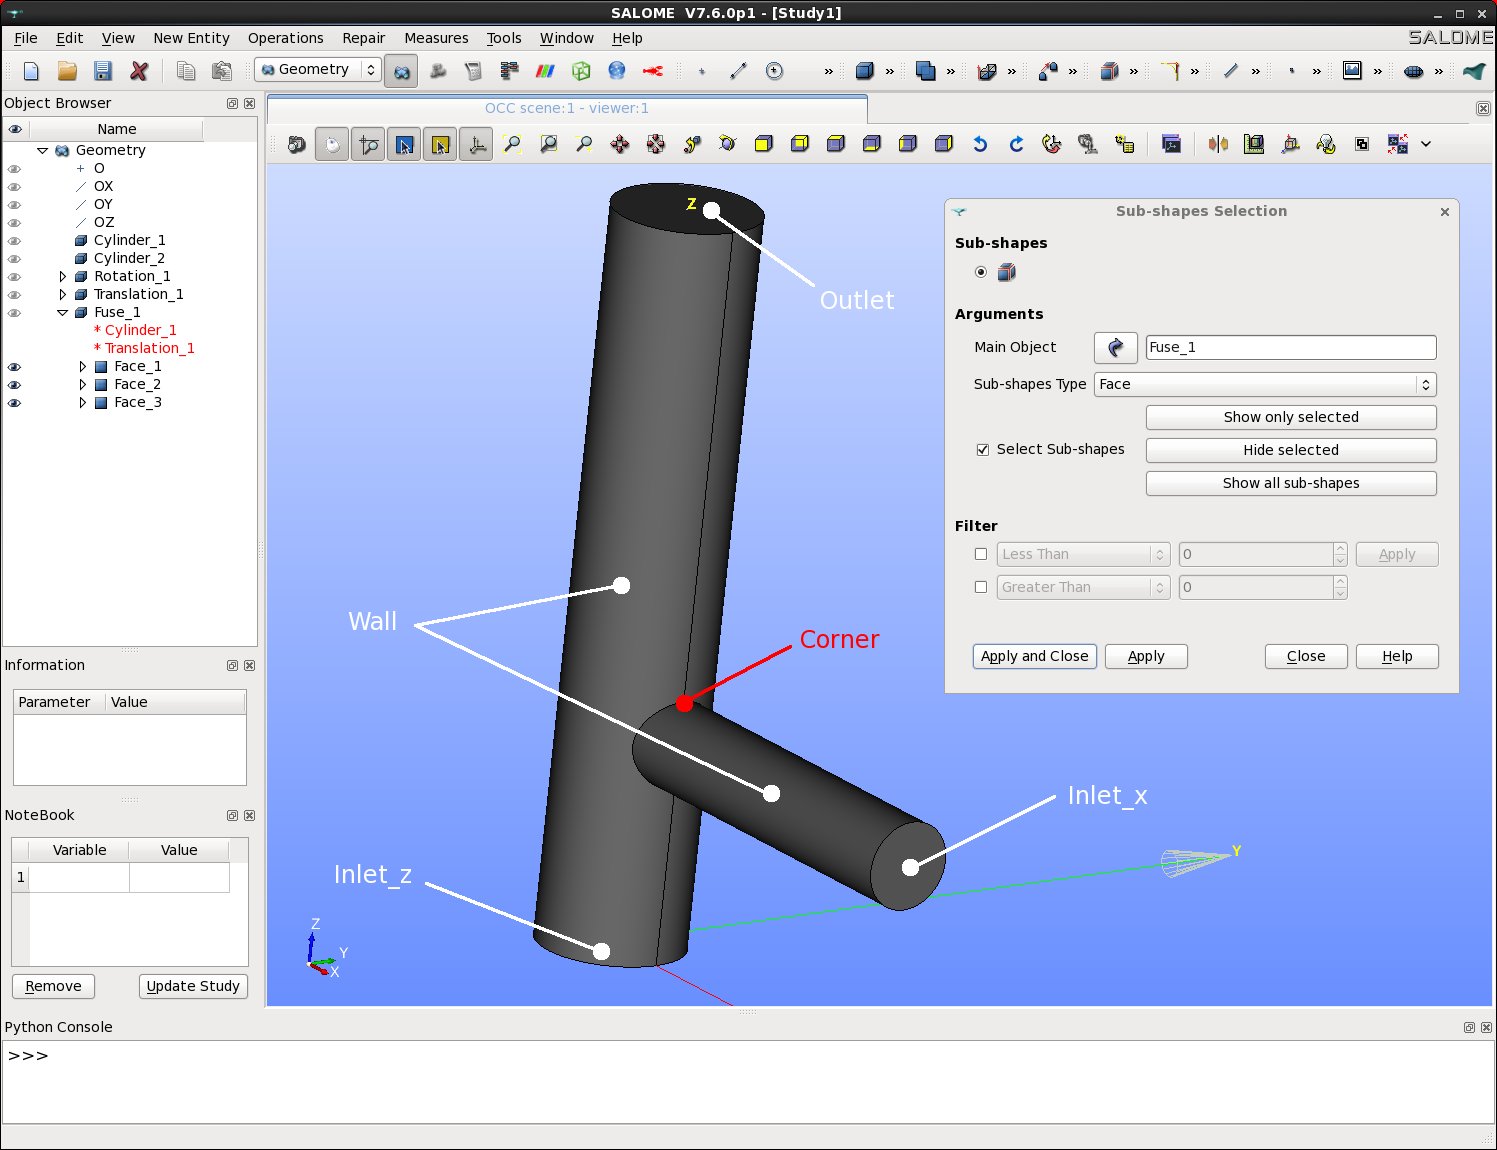
Creating Boundaries
Extracting Individual Faces
For each outlet/inlet face:
- Extract faces: New Entity → Explode
- Main Object: Fuse_1
- Sub-shape type: Face
- Select "Select sub-shape"
- Click on the desired surface in the visualization window
- Click "Apply"
- Rename the face:
- The face will be created as "Face_1" under Fuse_1
- Right-click and select "Rename"
- Rename to: Outlet, Inlet_x, or Inlet_z
Face extraction
Creating the Wall Group
- Create a surface group: New Entity → Group → Create Group
- Shape Type: Surface
- Name: Wall
- Main Shape: Fuse_1
- Click on the lateral surface of Cylinder_1 → "Add"
- Click on the lateral surface of Translation_1 → "Add"
- Click "Apply and Close"
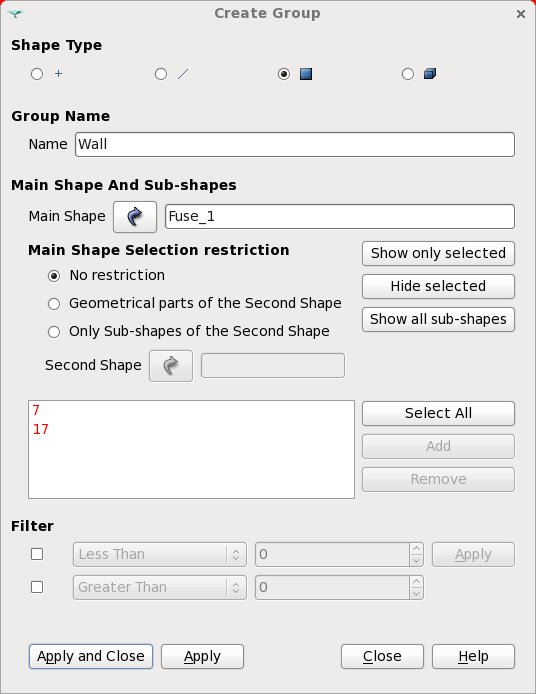
Wall group
Creating a Corner Point
This point will be used for local mesh refinement:
- Extract a vertex: New Entity → Explode
- Main Object: Fuse_1
- Sub-shape type: Vertex
- Select "Select sub-shape"
- Click on the chosen corner point
- Click "Apply and Close"
- Rename: Rename "Vertex_1" to Corner
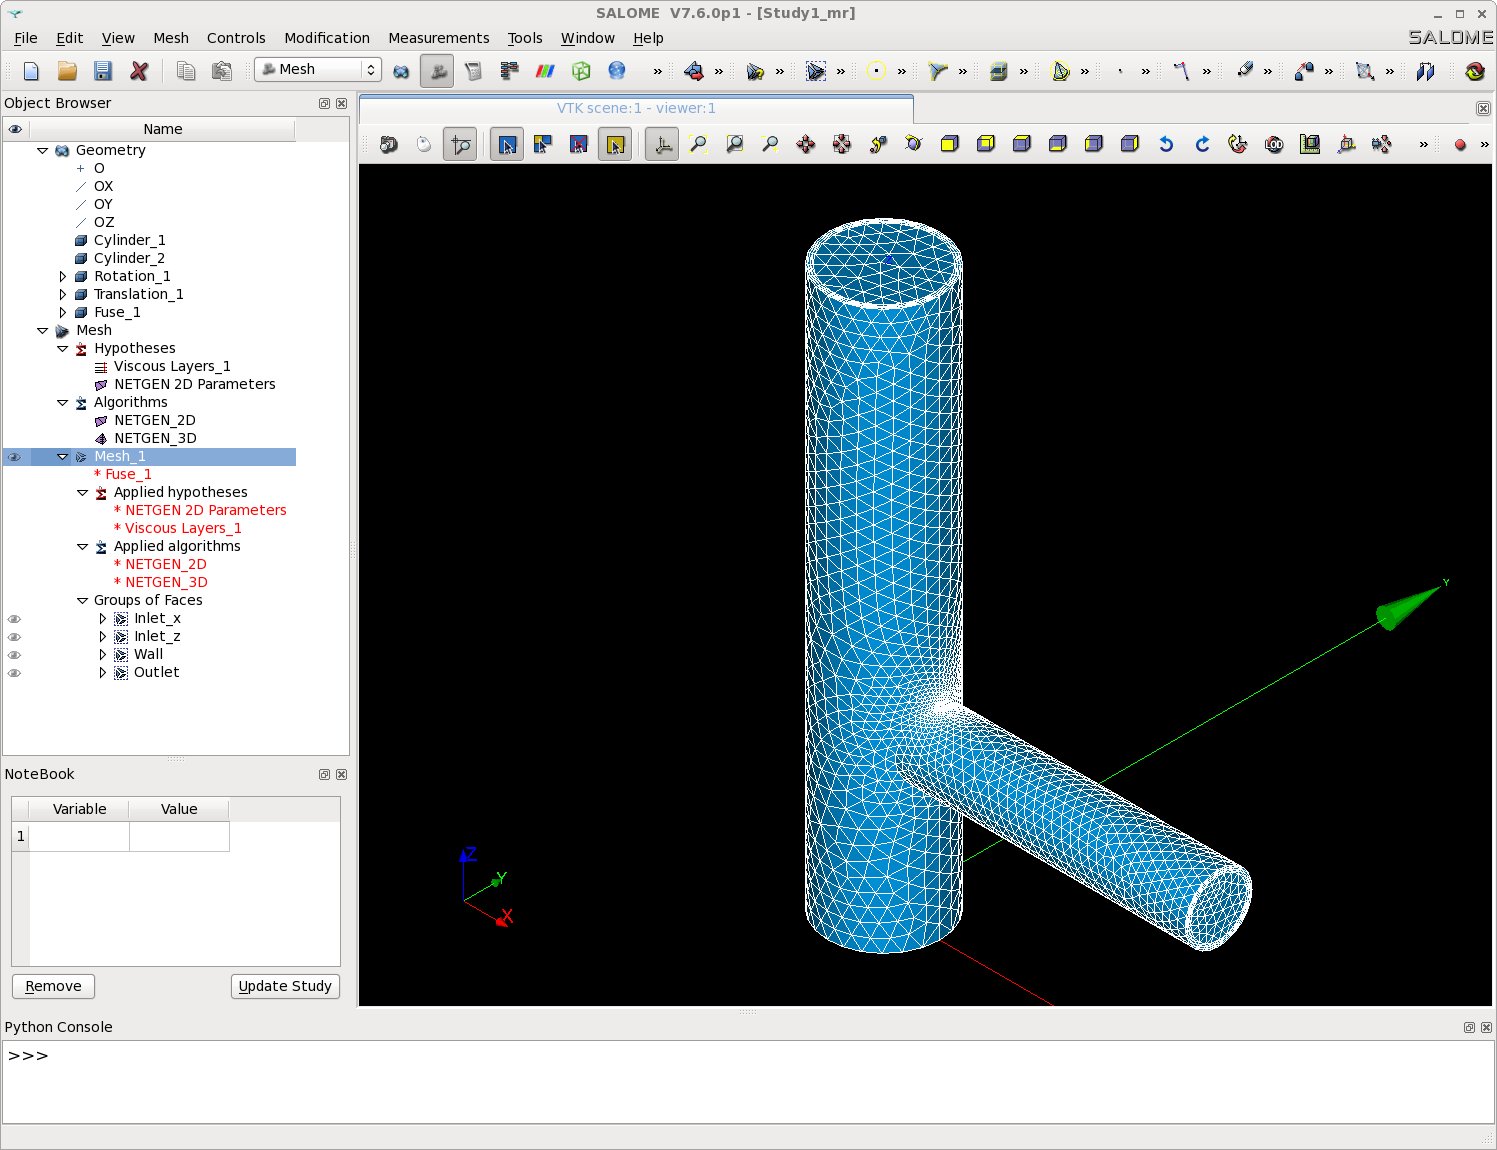
Creating the Mesh
- Switch to the Mesh module from the drop-down menu
- Display the geometry:
- Select "Fuse_1" in the Object Browser
- Right Click → 'Show' (or click the eye icon)
- Create the mesh: Mesh → Create Mesh
- Select "Fuse_1" as the geometry
- Configure the 3D algorithm: Choose "Netgen 3D"
- Add viscous layers:
- Click the wheel icon next to "Add. Hypothesis" → "Viscous Layers"
- Total thickness: 0.05
- Number of layers: 3
- Stretch factor: 1.1
- Extrusion method: Node Offset
- Add the "Wall" group to "Faces with layers (Wall)"
- Click "OK"
- Configure the 2D algorithm: Choose "Netgen 1D-2D"
Set 2D parameters:
- Click the wheel icon next to "Hypothesis" → "Netgen 2D parameters"
Arguments menu:
- Max. Size: 0.6
- Min. Size: 0
- Fineness: Custom
- Growth rate: 0.1
- Nb. segs per Edge: 2
- Nb. segs per Radius: 4
- ☑ Limit size by Surface Curvature
- ☑ Optimize
- ☐ Allow Quadrangles
- ☐ Second Order
Local Size menu:
- Select the "Corner" object in the Object Browser
- Click "On Vertex"
- Set value to 0.01
Advanced menu:
- ☑ Fuse Coincident Nodes on Edges and Vertices
- Click "OK"
- Apply and compute:
- Click "Apply and Close"
- Select "Mesh_1"
- Right Click → Compute
Converting to a Tetrahedral Mesh
- Select "Mesh_1" in the Object Browser
- Go to: Modification → Split Volumes
- Select "Tetrahedron"
- Keep the default parameters
- Click "Apply and Close"
Exporting and Saving
- Verify boundaries: Check that all four boundaries appear under "Group of Faces" of Mesh_1
- Export the mesh:
- Select "Mesh_1"
- Right Click → Export → MED file
- Save as Mesh_1.med
- Save the study:
- HDF format: File → Save/Save As...
- Python format: File → Dump Study...
Note: The solution file (T_shape.py) is available at: $TRUST_ROOT/docs/exercices/salome
Running with TRUST
Copy and run the TRUST data file:
cp $TRUST_ROOT/docs/exercices/salome/T_shape.data .
trust T_shape
Or run in parallel:
trust -partition T_shape
trust PAR_T_shape 4
Visualize the results with VisIt or SALOME by opening:
- Sequential: T_shape_0000.med
- Parallel: PAR_T_shape_0000.med
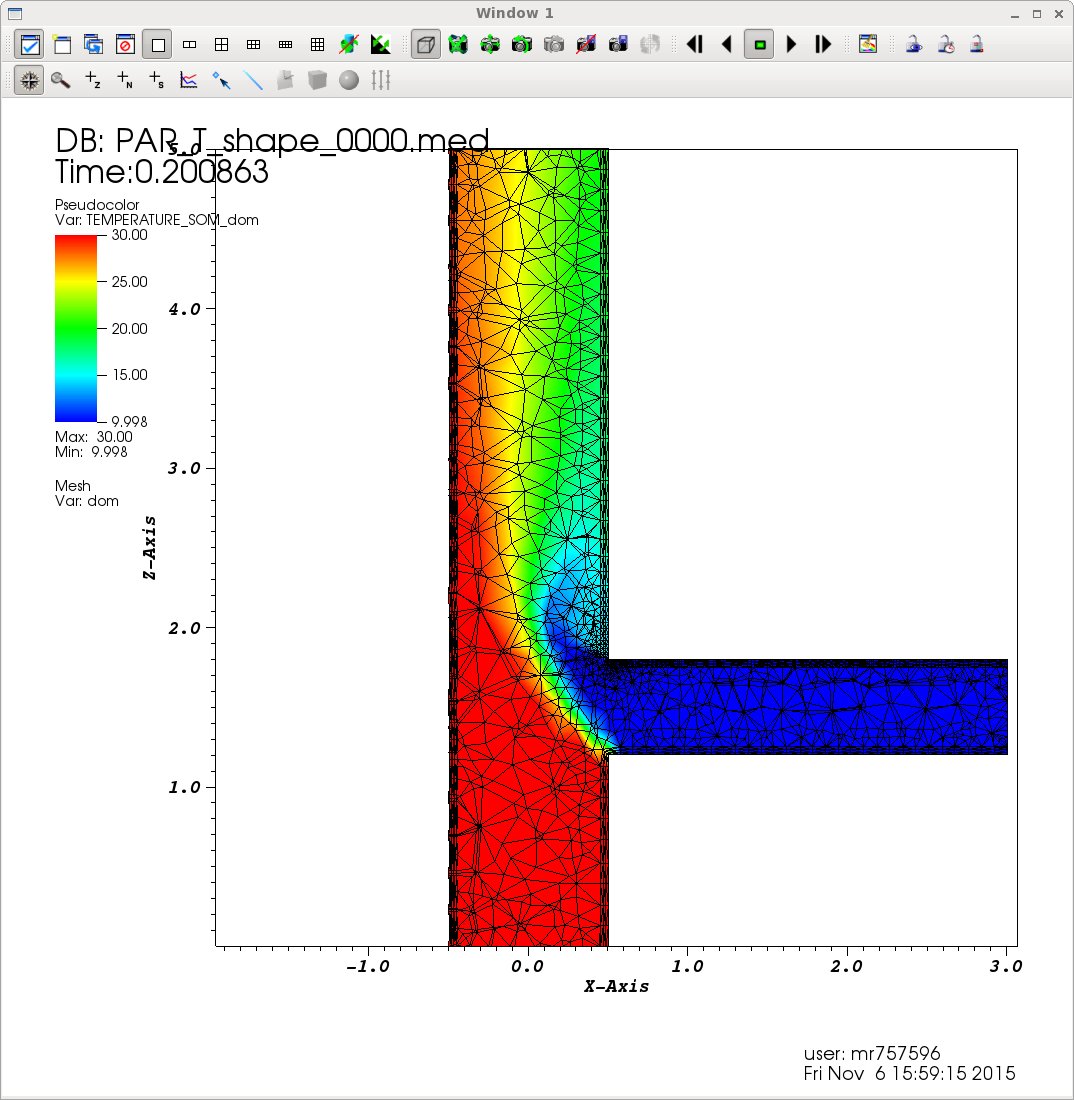
Visualization with VisIt